February 15, 2025
Digital Marketing
0
minutes reading
Framer & MailerLite - The Integration You Were Waiting For
We took advantage of the webhook feature and integrated MailerLite into our Framer website.
Framer, as great as it is, has limited options for your mailing integrations. Or has it? The list of native integrations is arguably short with only five mailing tools available: Loops, Formspark, Mailchimp, Get Waitlist, and ConvertKit (now Kit). However, there is also an option to use a webhook. Let's have a look at how we can take advantage of this feature and integrate MailerLite into our website.
Un/fortunately, to follow this post blog post you needn't know anything, but to recreate it the knowledge of JavaScript is probably necessary. Although you might still give it a shot with the help of an AI!
I also assume that you have some preceding knowledge of Framer.
Integration Structure and Tech Stack
Let's take a look at our battle plan real quick and what tools we need for our integration.
Tech Stack
Framer
MailerLite
Cloudflare
Our tech stack consists of some of the sound names in today's digital marketing. Framer, our website builder. MailerLite, it's a much cheaper option, more intuitive, and with transparent pricing than Mailchimp. (sorry not sorry champ)
But the magical ingredient is Cloudflare. A tool where we can create a middleware API gateway – where we can send a request, validate it, transform it, or enrich it, and generally process it before forwarding it to MailerLite. More specifically, we will utilize the Cloudflare workers.
Integration Structure
We will create a landing page with a form in Framer. (Not in this guide.)
This form will use a webhook. From this webhook, we will call an API endpoint to Cloudflare.
Cloudflare worker will take the request, process it, and then call the MailerLite API endpoint.
MailerLite will take the request, process it, and add a new subscriber to the mailing list.
Step-by-Step Plan
We will prepare all the tools needed for the integration.
We will write the code for our API gateway in Cloudflare.
We will connect the Framer form to the Cloudflare worker (our API gateway).
We will test the integration.
All clear? Fair enough, let's bring this to life.
Preparing the Tools
Preparing MailerLite
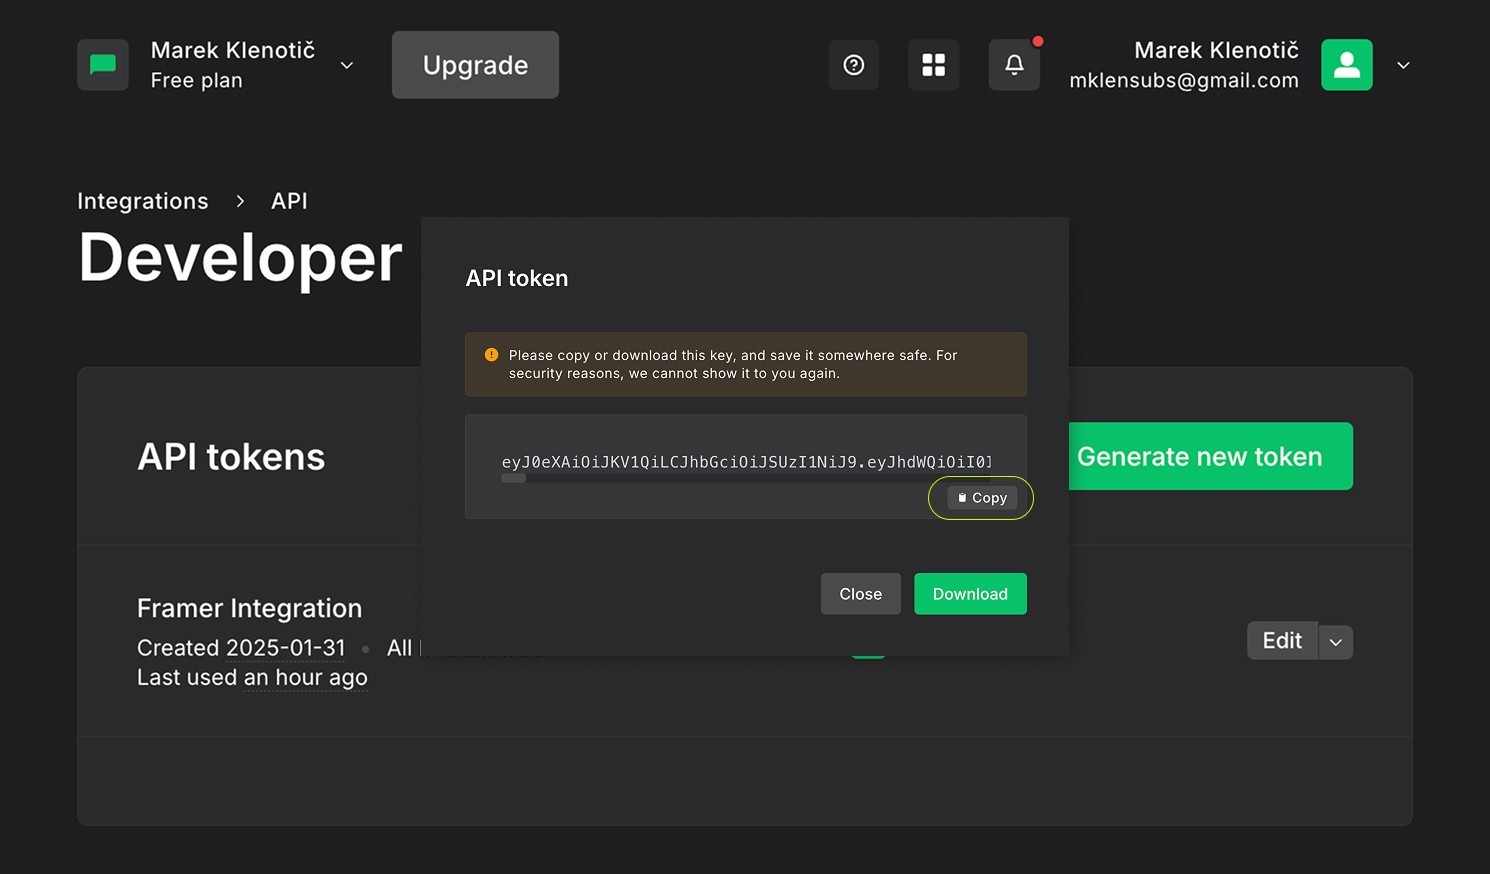
Let's start with the MailerLite. I will omit the general onboarding of the tool because that is outside the scope of this post. After creating your new account in the ML, go to the integrations section in the left panel. Click "use" under the API Category and API option. Name your new API token and create it. Lastly, copy it securely and leave it on the side. We will need it later.
Use the MailerLite API.
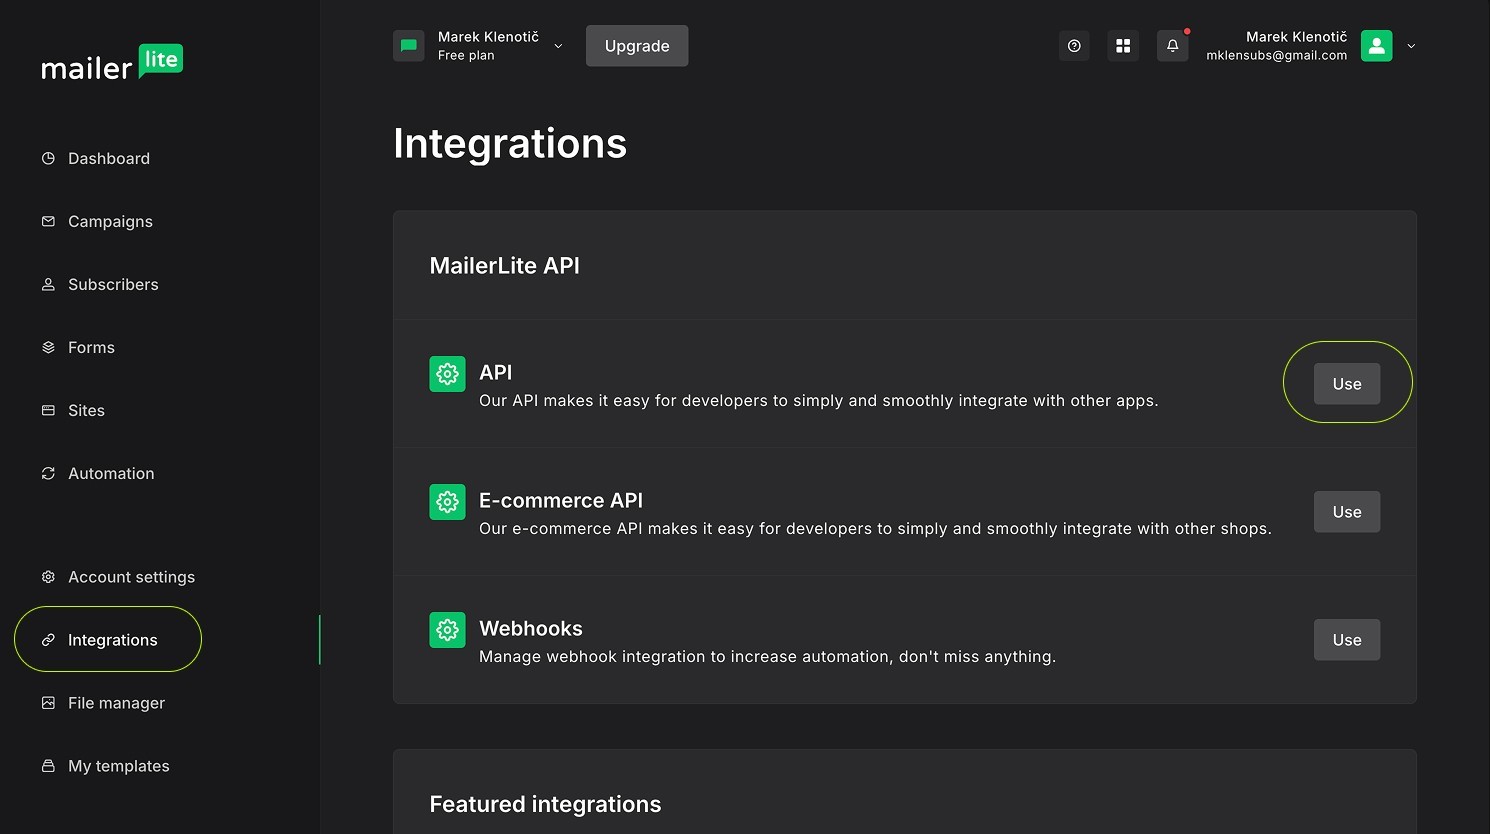
Create a new API token.
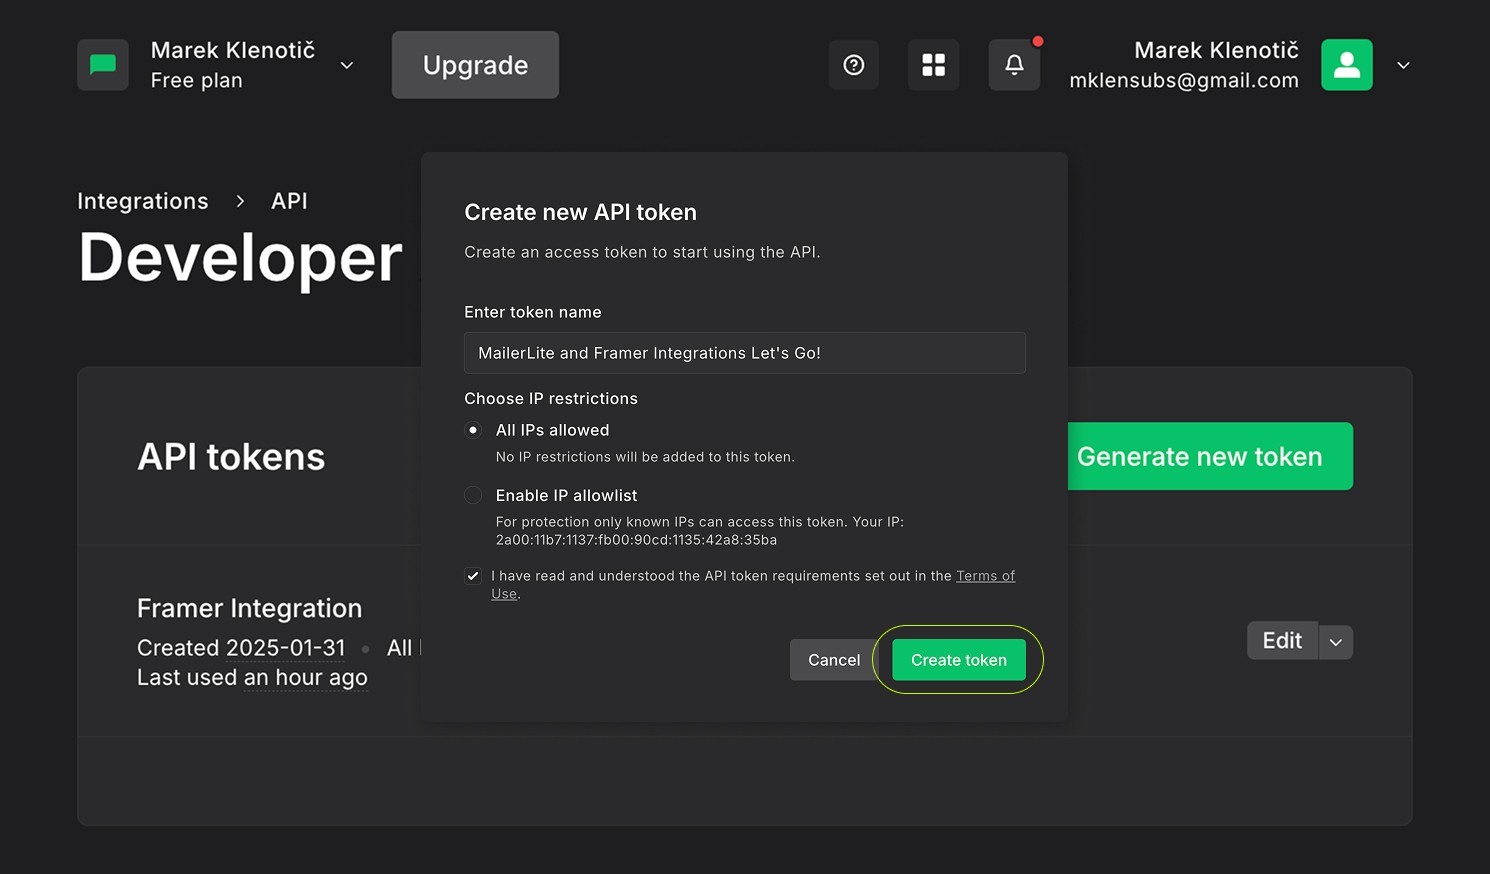
Don't forget to store your token securely on the side for later.
Preparing Cloudflare
Regarding Cloudflare, all we need is a new free account. Head to the https://cloudflare.com/ and create it. There, look into the left navigation panel, we will need the Compute (Workers) option, then Workers & Pages.
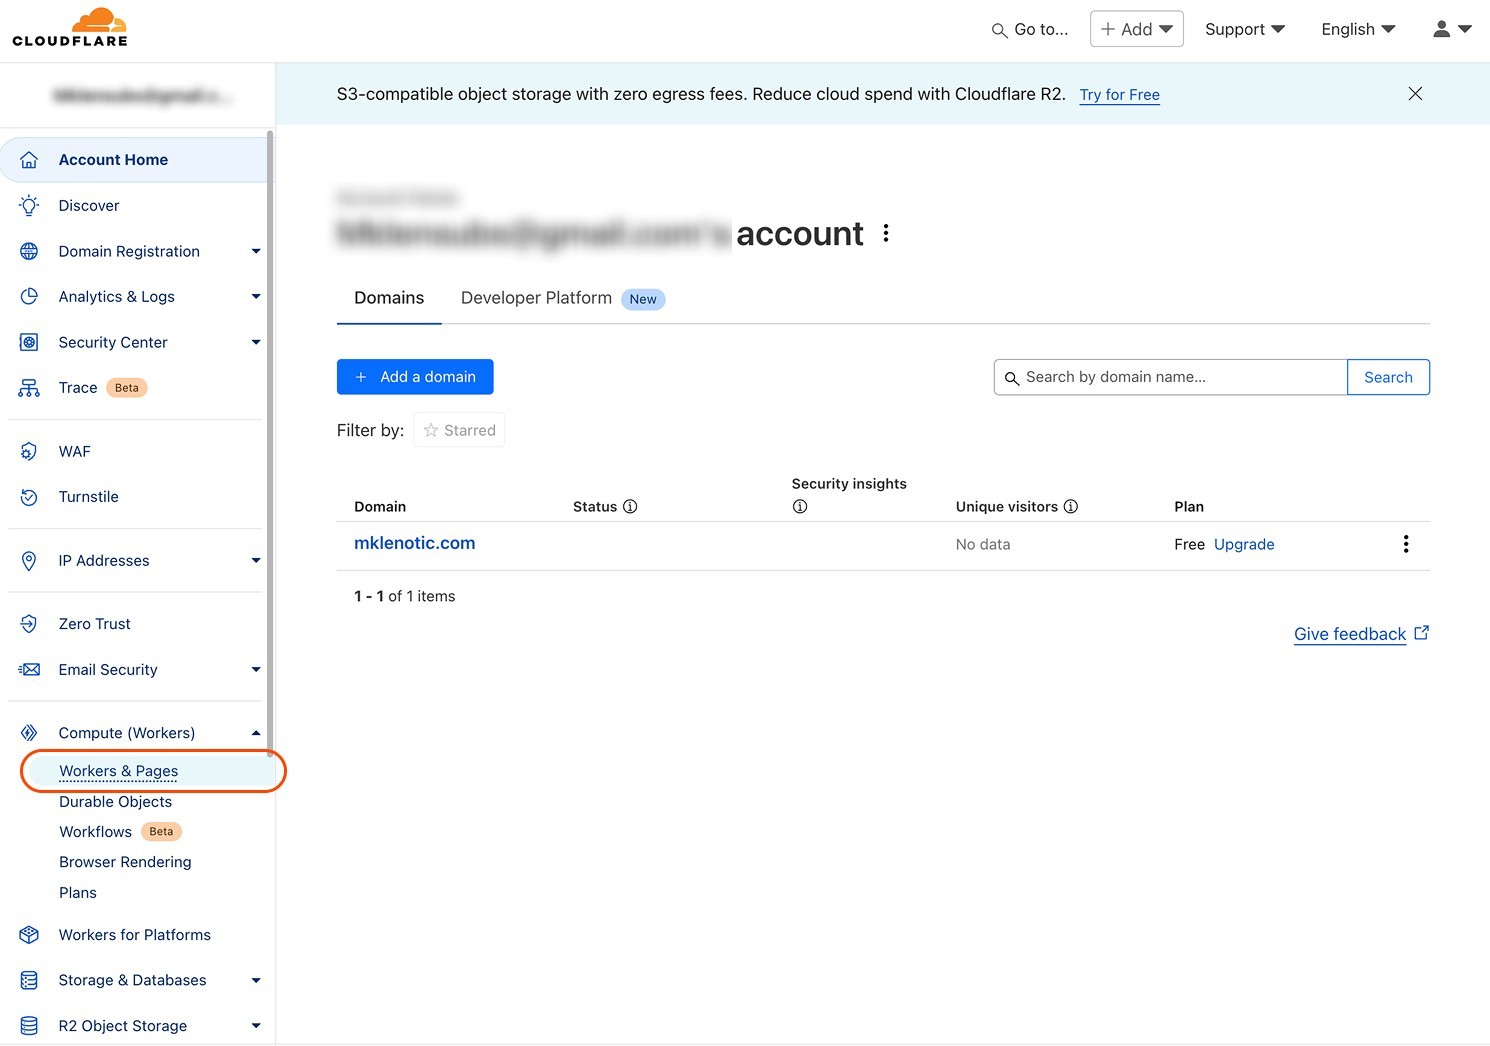
Once there, create a new worker and name it.
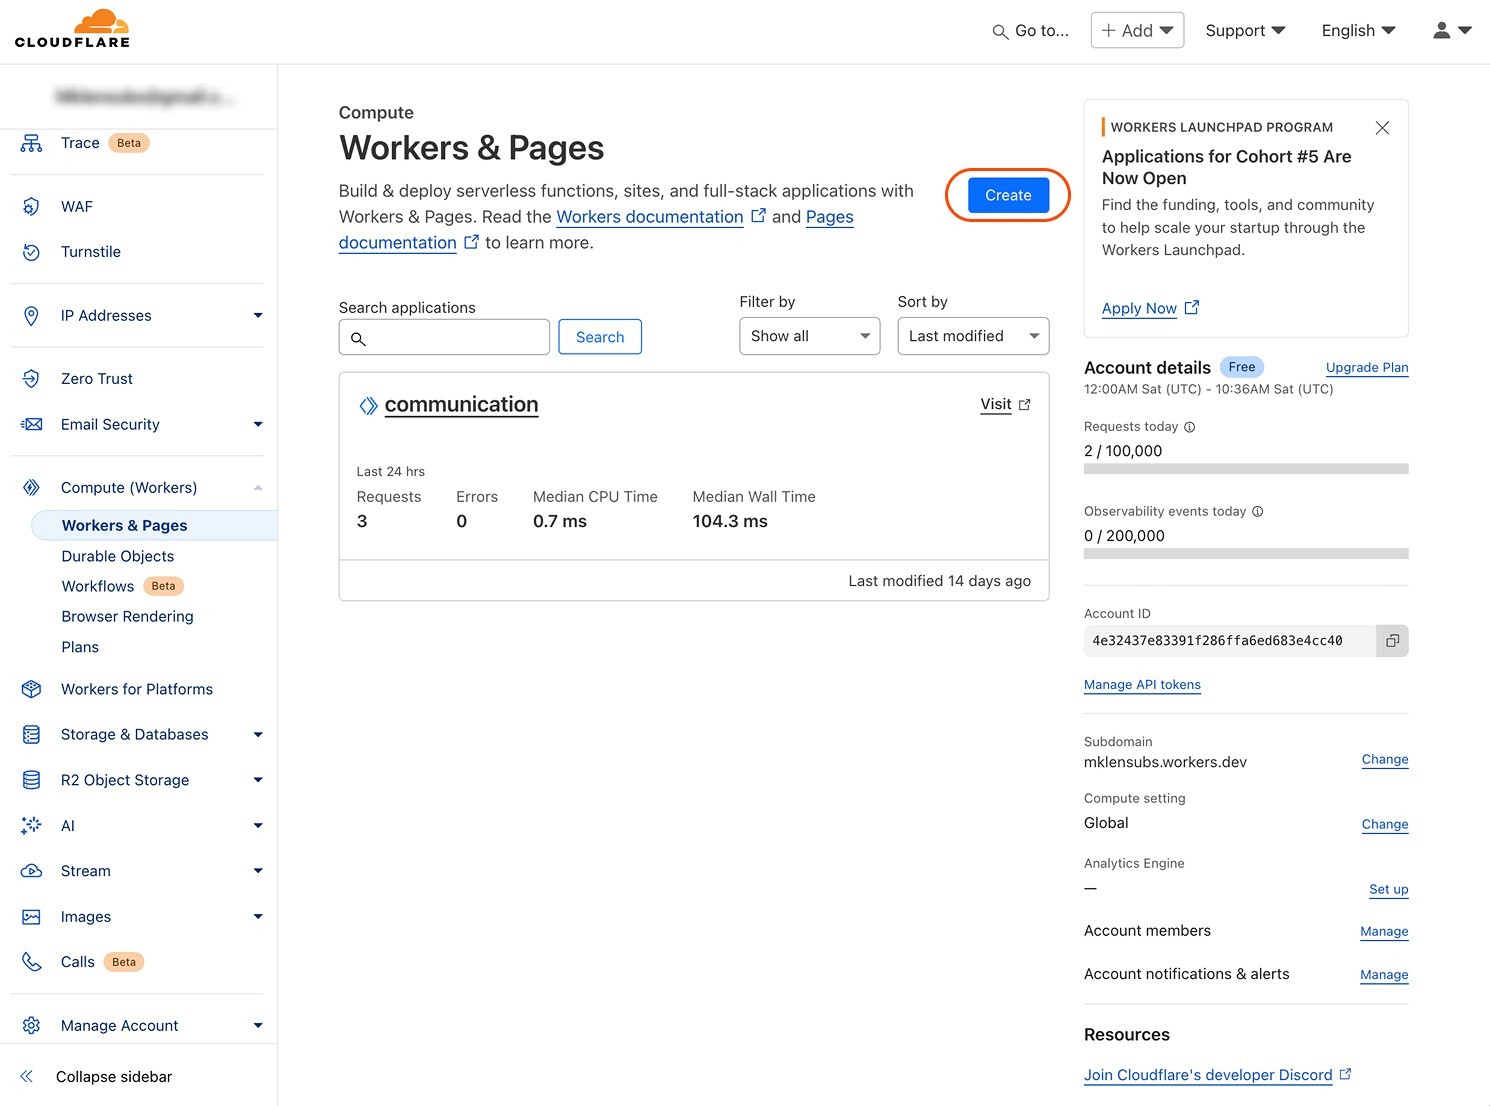
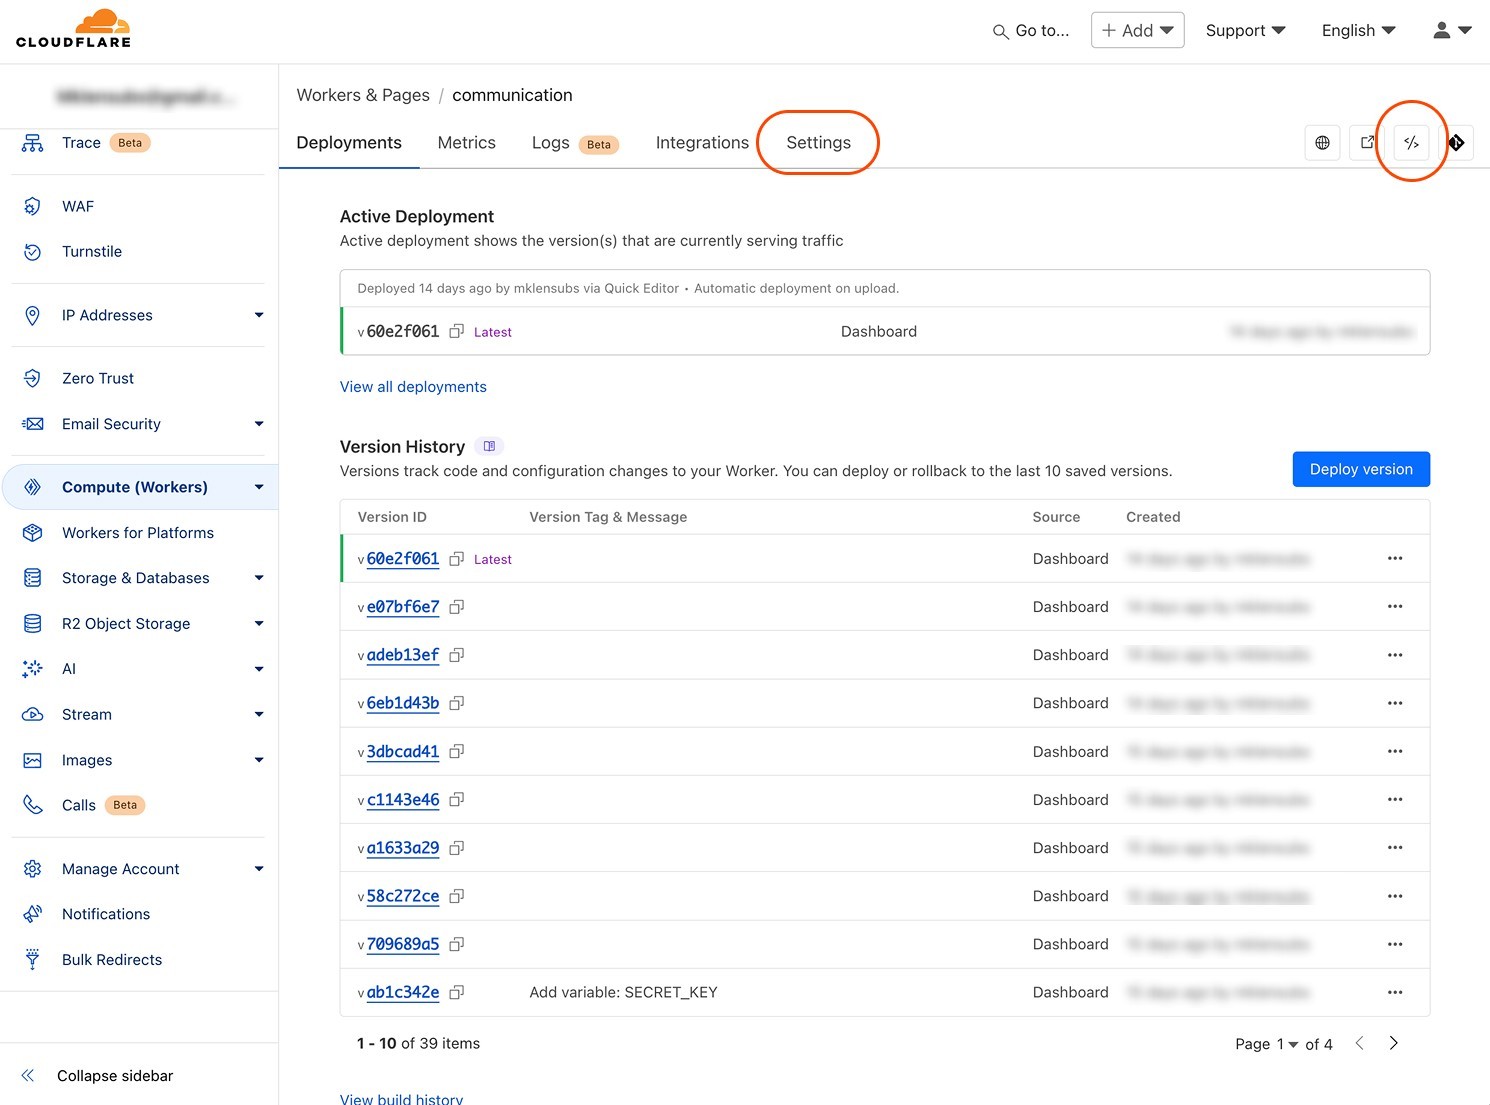
After creating a worker, familiarize yourself with the worker dashboard. In the top right corner area, there is an icon for code, through which you can access the code editor for the worker. We will edit the code for the worker in the next chapter.
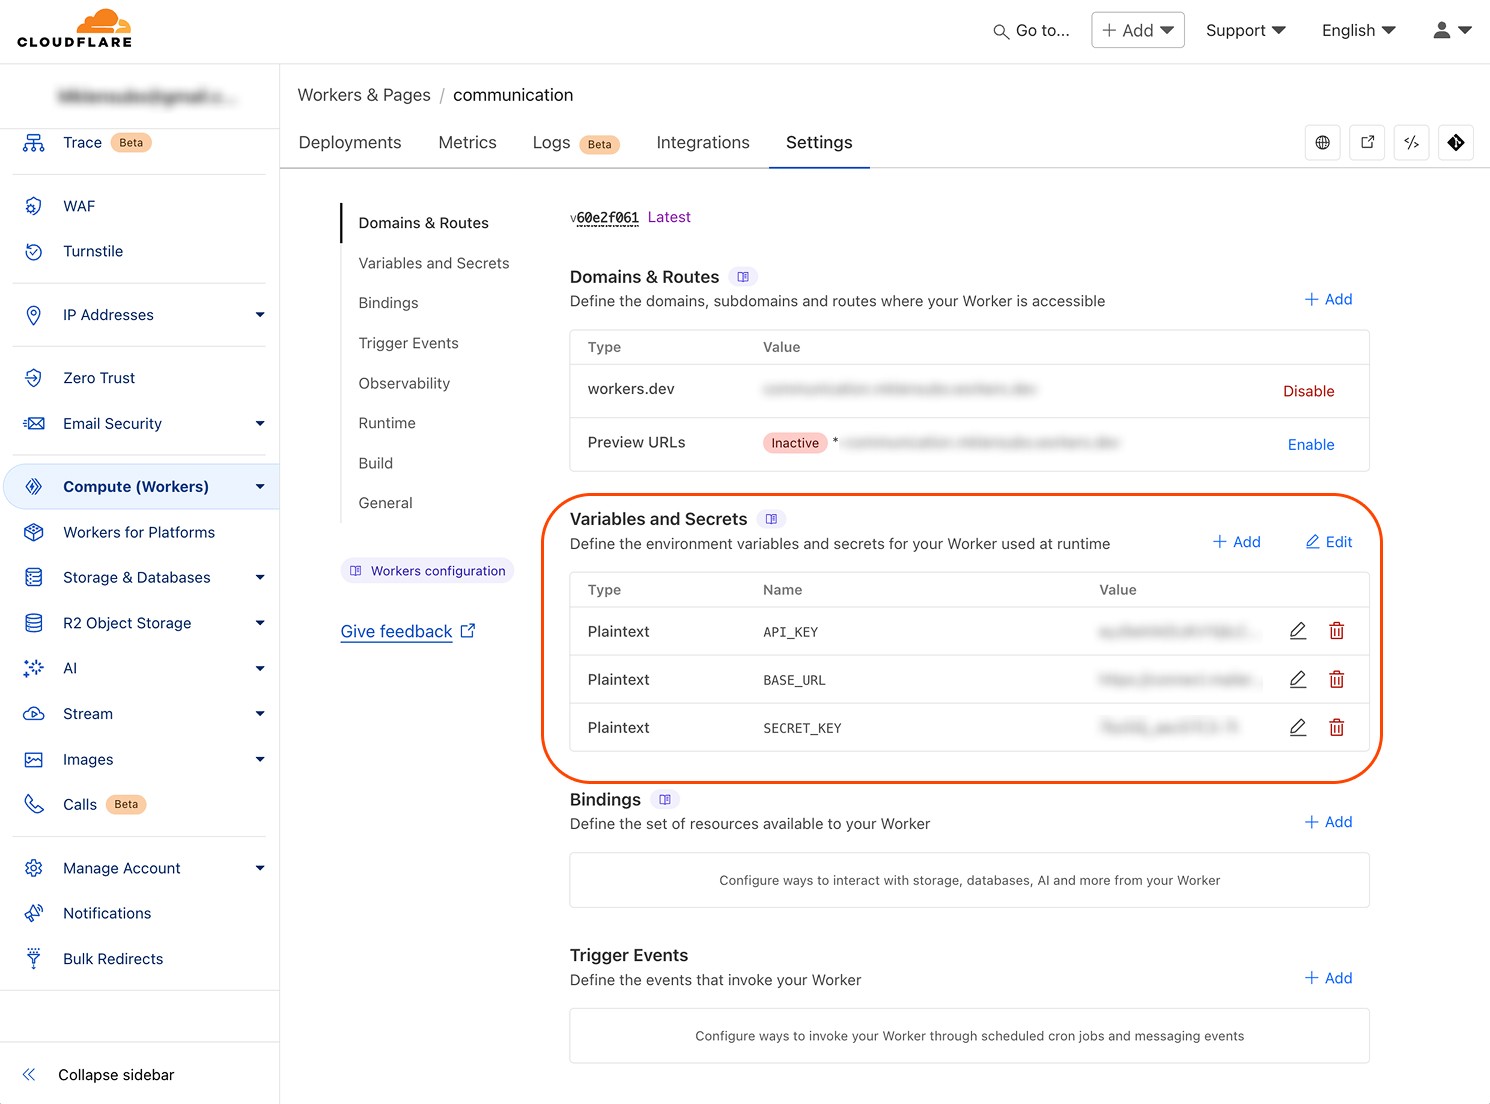
Also, pay attention to the settings, which allow you to use environmental variables rather than directly embedding the secret information in the code.
The configuration of secret keys is under the category Variables and Secrets. What a mysterious name. haha. Even though I am not sure whether you even need to utilize server-side variables for this integration, it is generally a best practice to use them if you can while working with API keys and secrets.
Creating the Integration
Now that we have all the tools prepared, let's make the integration happen. Shall we?
I will structure this part of the guide into several sections, dividing the code based on the process phase that the request goes through.
Request Validation & API Routes
The first part of the code handles the request validation to Cloudflare, mainly the allowed origin and secret key. A secret key is a security measure added to the request as a query parameter to offset bad bots. When creating the integration, I wasn't sure how the Framer handles the network request to Cloudflare from the client side so as a security measure, I thought of an additional query parameter instead of having a playing API URL endpoint to make it harder for scrapers to get the URL and use it. But it is not necessary since the worker API endpoint URL is not visible on the client - meaning it's safe. Thank you Framer 🫡.
Handling API Routes
Implementing API Functions
The GET function is unnecessary. When creating the integration, I was thinking about maybe displaying the number of subscribers already subscribed to the newsletter so that's why I created the GET function too.
Handling the Incoming Data
Sending the Request to MailerLite
Using all the parts of the code together, we have created an API gateway to MailerLite. It handles all incoming requests, validates them, parses the data correctly as MailerLite expects, and sends the POST request to MailerLite.
Using the API in the Framer Form
Now when we have the API gateway code ready, we can use its end-point/s in Framer. Let's create a custom form and configure it to send subscribers straight to our mailing list.

Insert the form builder from the left menu. When you click the entire form, you can see multiple options under the form category in the right panel. After clicking the webhook option, a blank API field appears. But first, let us prepare the form.
We can send all the data that corresponds to the MailerLite documentation. For our example, we can use Name, email, and optionally, the group ID.
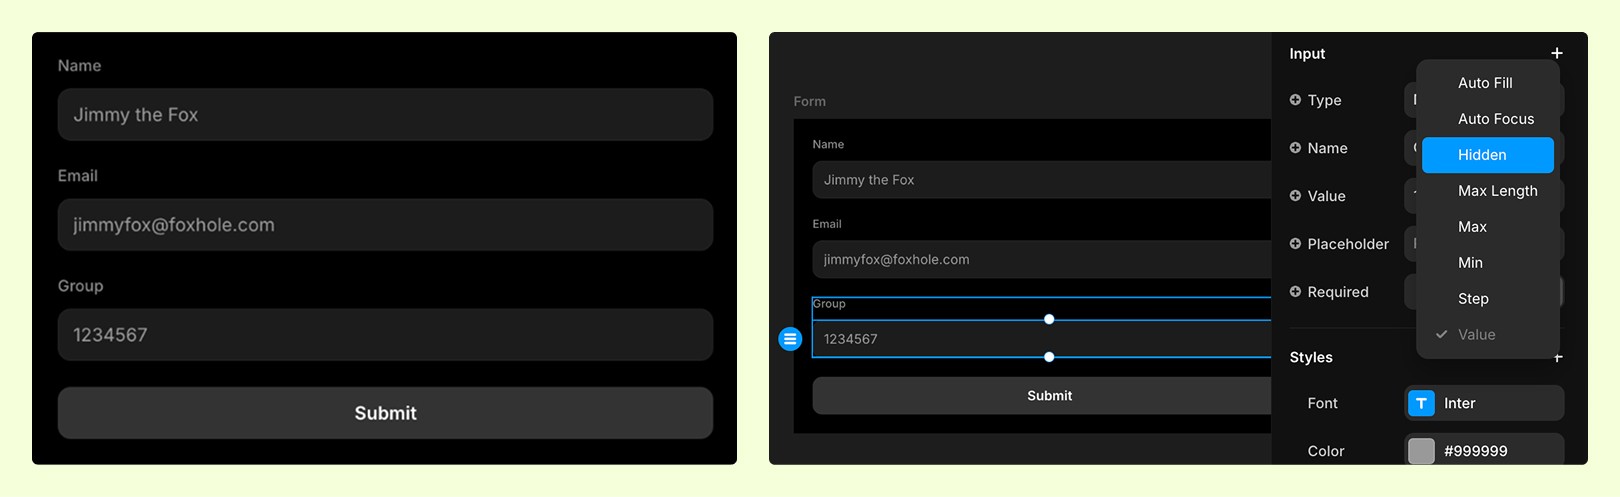
Tip: If you want to segment your audience based on the form from which they came, you can define a field named Groups. Then, in MailerLite, define your subscriber's group and get its ID. You can use this ID in the hidden field of your form and send it together with other data. Subscribers coming from this form will be sorted into their designated groups.
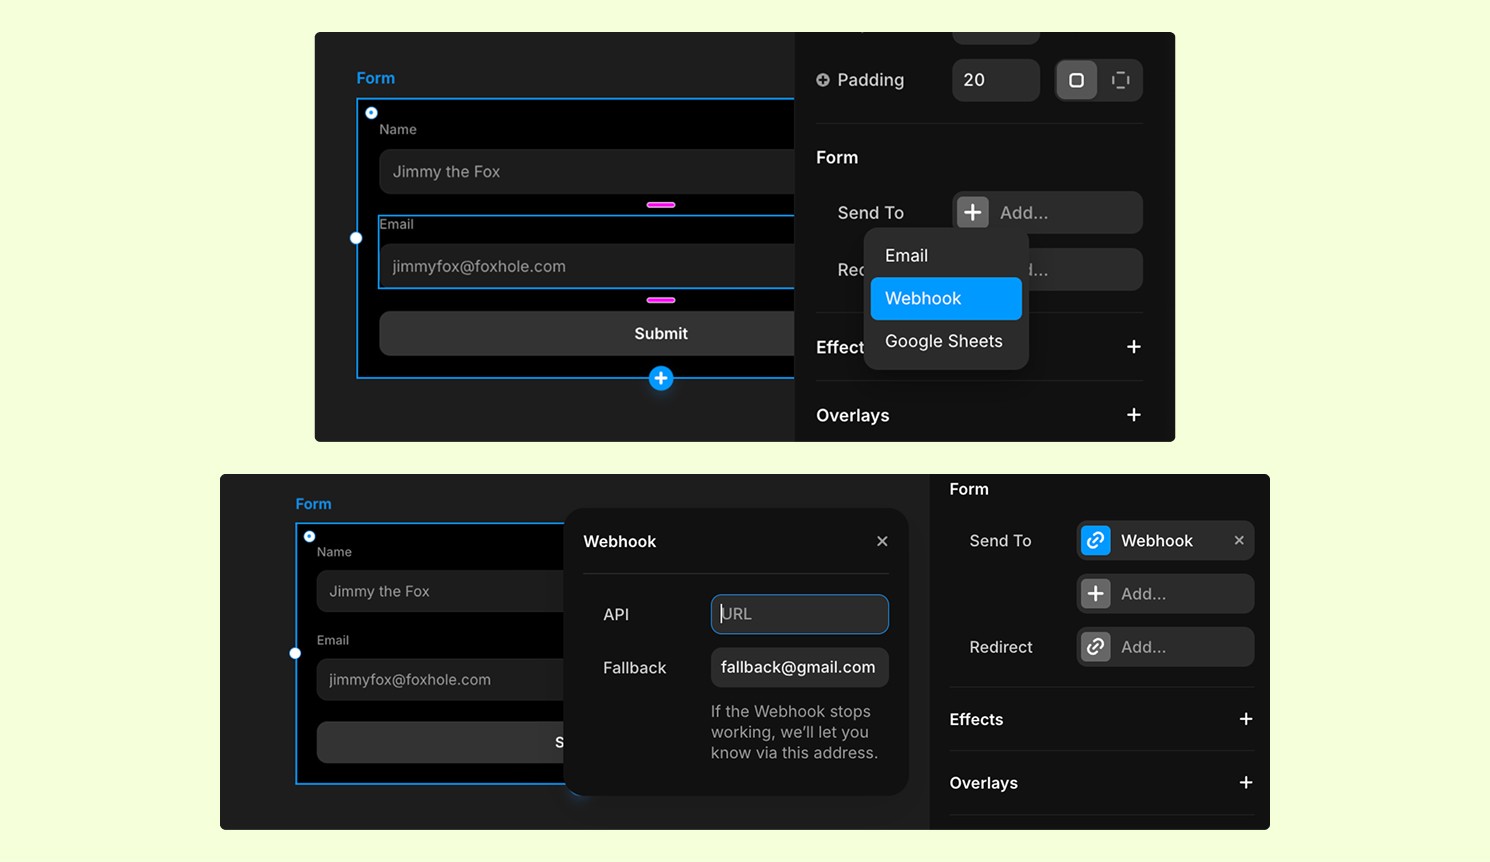
After creating your form and defining its fields, let's insert the API URL of our Cloudflare worker. The URL is in the top right area of your worker's code editor.

Don't forget to attach the API path at the end and the secret key in the query parameters. Ours can look like this https://name-of-your-worker.your-account-name.workers.dev/subscribe?key=your-secret-key
Now all the parts of the integration are ready and we can test it out.
Testing
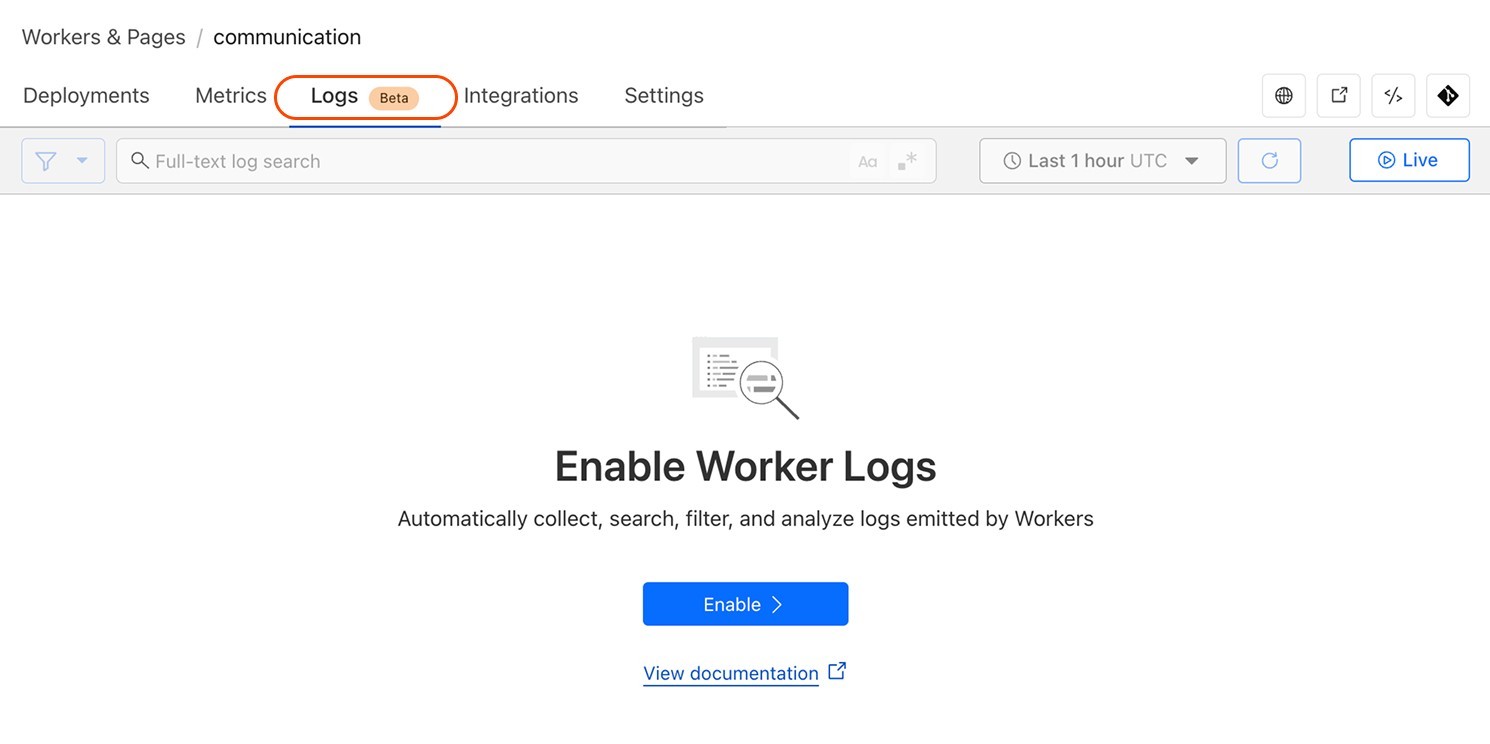
To start the testing, let's head to the log section in our Cloudflare worker. The log section can be found in the top navigation bar of your worker's dashboard.
Logs are helpful for debugging the request process. I found them particularly effective for analyzing the structure of the data object to align it with the MailerLite documentation.
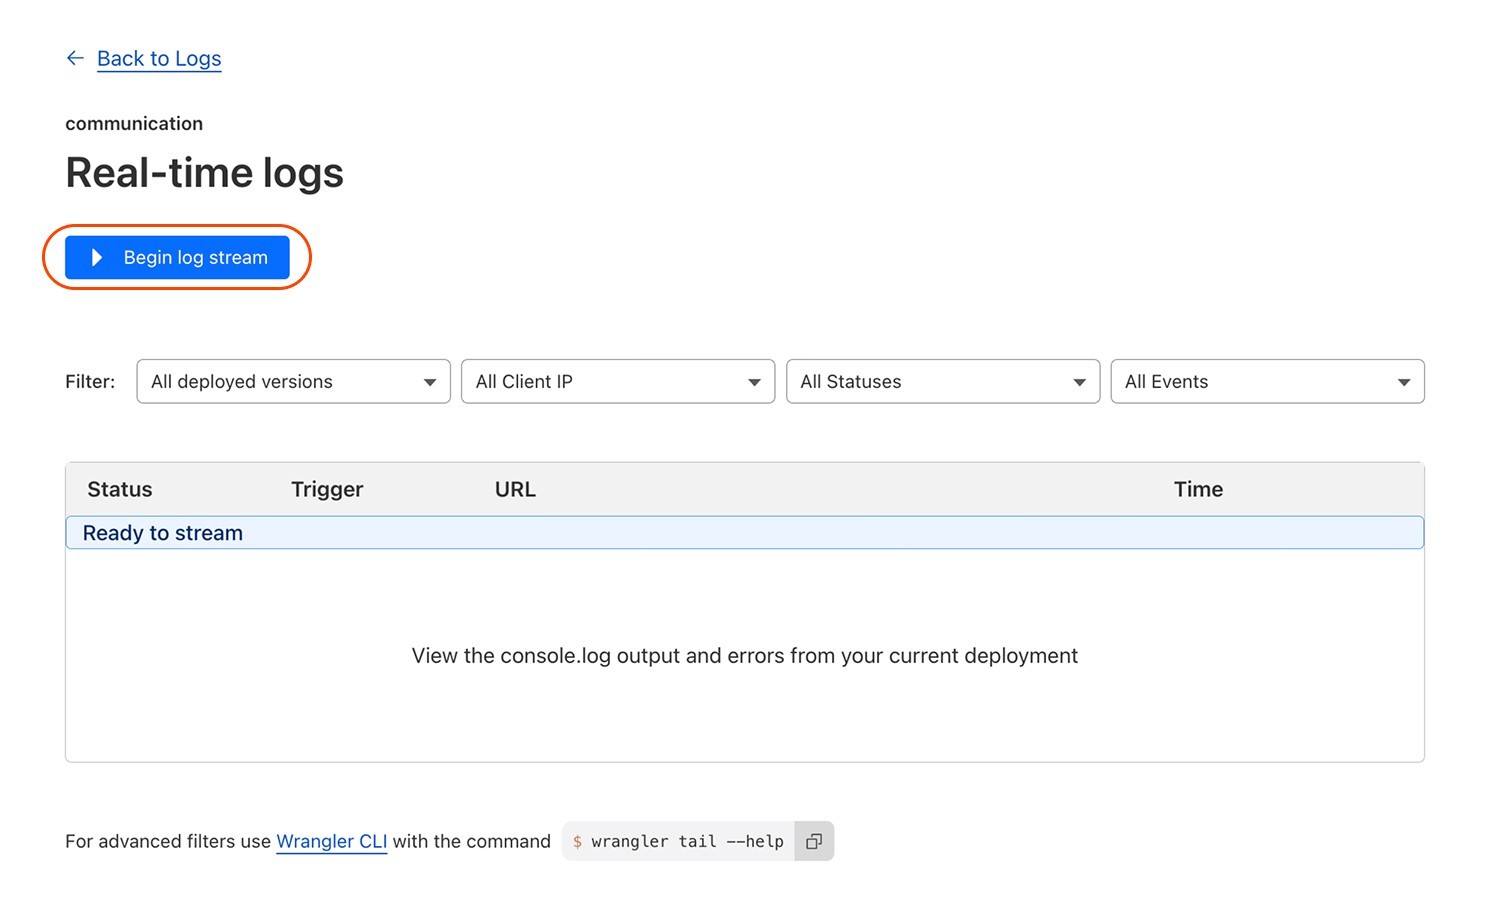
Don't forget to start the log stream before you begin debugging the integration.
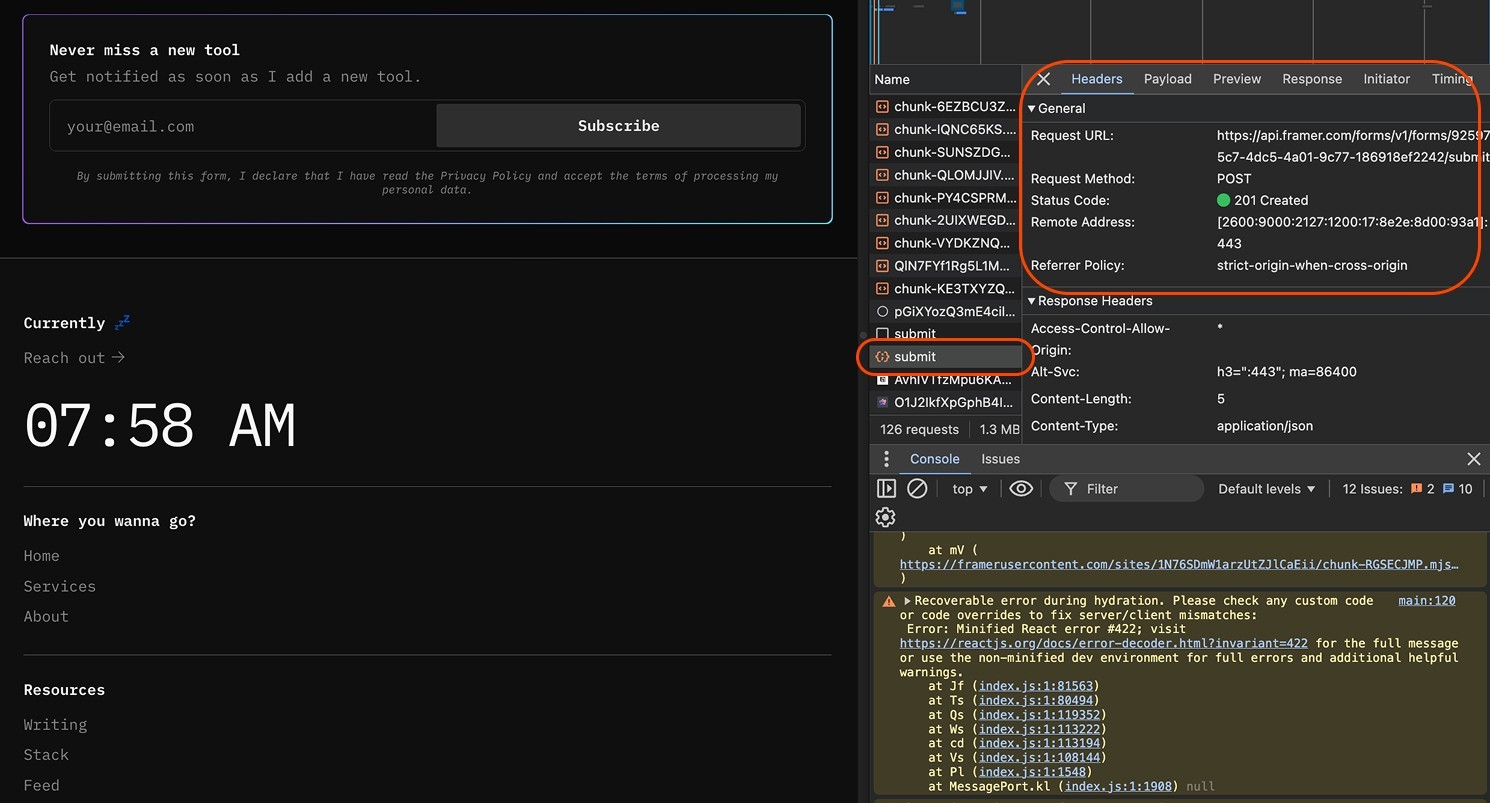
To test the request, use the form you previously created on your website. The request should always be posted with code 201 to the Framer API. This ensures a secure connection to the worker endpoint (the API endpoint URL is not visible on the client).

Our post has been logged with code 200 meaning the request from Framer was processed and successfully sent to MailerLite.
Final Thoughts
Making the Framer integration with MailerLite was fun. I like that the possibility of using your mailing tool is there as long as the tool provides an API and documentation. Additionally, I was testing Cloudflare workers for automatic reporting from Google Sheets before, and this is yet another way to use the multifunctional capabilities of its workers, which opens new possibilities for future automation ideas or integrations.
Do you want to test the integration out? Head to the Stack 🔗 and sign up for my newsletter.